Assalamu'alaikum Wr.Wb
Kali ini saya akan mengimplementasi Hotspot dengan RouterBoard MikroTik
A. Judul/ Nama kegiatan: Mengimplementasi Hotspot di MikroTik
B. Pendahuluan
Pengertian
Hotspot adalah area yang digunakan orang/user untuk mengakses internet dengan media elektronik yang memiliki fitur wifi seperti smart phone, laptop dll
Maksud & tujuan
Membuat Hotspot melalui RouterBoard Mikrotik
Hasil yang diharapkan
Membuat Hotspot yang dapat diakses oleh user
C. Alat dan bahan
- PC
- RouterBoard MikroTik
- kabel UTP (Straight)
- Koneksi internet
D. Jangka waktu pelaksanaan
08:00-16:00
E. Proses & tahapan kerja
1. masuk ke winbox, setelah itu klik Interface> wlan1 di enable (klik tanda ceklis)
2. Doble klik pada wlan1> kita ubah. Mode: ap bridge> Band: 2GHz-B/G/N> (sesuaikan dengan spesifikasi laptop), Frequensi: bebas, cari saja angka yang terkecil , caranya klik Freq. usage> SSID: bebas
3. Buat Security profil. Klik di sup menu security profile beri nama security: bebas> ceklist pada WPA PSK & WPA2PSK> isikan password pada kolom password> apply> ok
4. Interface> double klik wlan 1> ubah security profile dengan nama security yang kita buat di langkah ke 3> apply> ok
5. Ip> DHCP server> DHCP setup> ubah interfacenya menjadi wlan1> next terus sampai sukses
catatan sebelum mengubah interface buatlah IP pada ip address untuk wlan1 terlebih dahulu
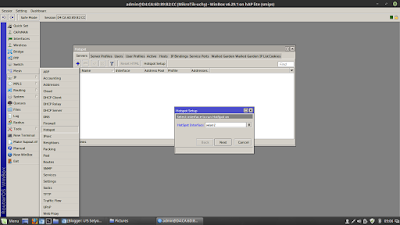
6. Ip> Hotspot> interface wlan1> next
7. ubah DNS name: bebas gunakan dot(.)> next
8. ubah lokal host dan password: bebas> next
10. Cek wifi anda. masukkan password (password security profile)> connect
11. Massukkan DNS name anda lalu anda bisa Login
F. Hasil yang didapatkan
Kita dapat mengimplementasikan Hotspot pada mikrotik
Pada saat memberikan IP pada wlan1 saya tidak memberikan slash(/) contoh: 192.168.100.1.
Cara mengatasiya saya gunakan slash contoh: 192.168.100.1/24
H. Kesimpulan
Kita dapat mengkonfigurasi routerboard mikrotik menjadi Hotspot
I. Referensi dan daftar Pustaka
- Modul Mikrotik MTCNA - Rifqi
Sekian dari saya
Wassalamu'alaikum Wr.Wb


